1. Basic Installation top
If you are facing issue regrading failure of theme installation or demo content installation make sure you followed first thing that you are uploading only theme files as full package contains documentation etc. For failure issues increase limit for following variables of your web server or localhost if you are installing it on local machine as:
- max_execution_time
- max_input_time
- memory_limit
- upload_max_filesize
You can directly paste theme files under wp-content/themes directory via FTP account of your WebServer.
All above steps are required in case of failure else enjoy installation.
How To Install ICO WP Theme.

- Click on Appearance-->Themes
- Then Click On upload To upload your theme
- Choose theme zip file to upload.
- After Uploading Theme zip file Click On Install now button

When theme is uploaded click on activate to activate ICO WP Theme.
Plugins Activation
After activation of theme you will see notification at the top of the page. Begin installation of plugins.

Here just click on install under the plugin name to install and activate plugin.

After plugin successfully installed just click on"return to required plugin installer" to go back to plugin installer..
2. Importing Dummy Data top
To import demo content please follow below mentioned steps:
Step 1:
Go to tools section and click on import and then just click on WordPress it will lead you to import plugin

Step 2:
Just click on install now button to install importer plugin.

Step 3:
Click on Activate & Run importer to activate and run importer..

Step 4:
Click choose file button and select ".xml" file from theme folder. After Choosing the file click on file uploader and import.

Step 5:
You Have to do 2 things,
- 1- Select Admin as an existing user.
- 2- Check Download and import file attachment Box.
- then simply click on submit button.

Have Fun!
Don't forget! Do not forget to select the home page under Setting -> Reading -> Static Page.
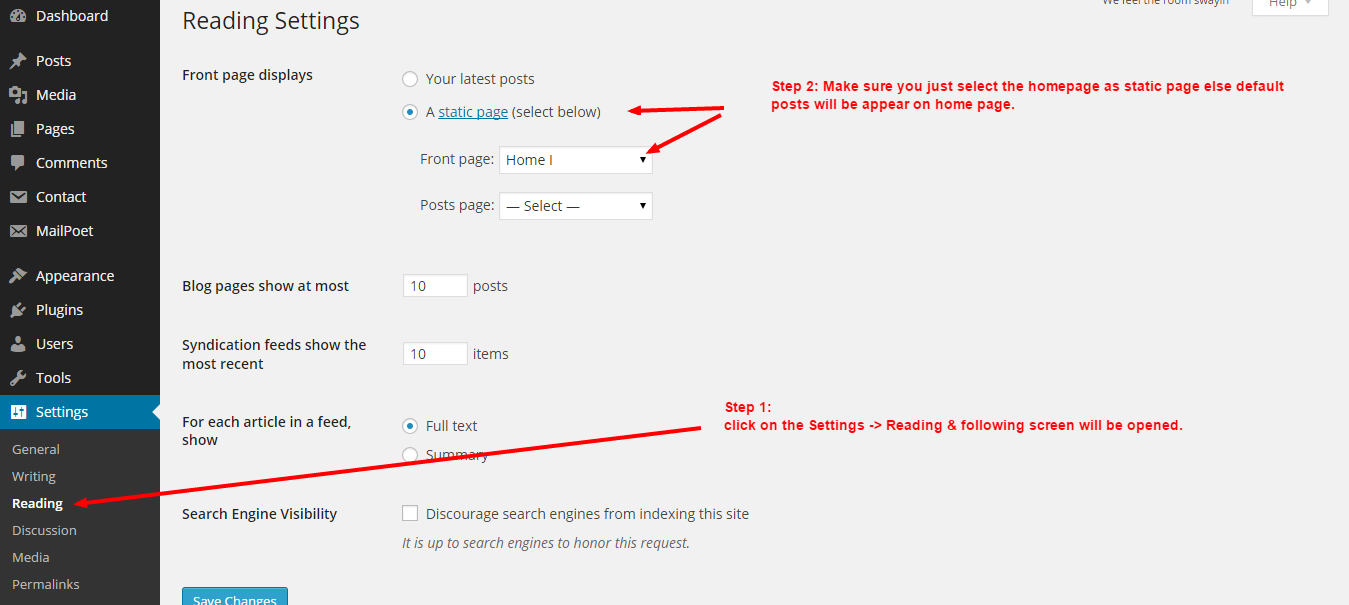
Save pages & posts if data won't appeared!
Error Uploading Theme
If you are facing any error to upload the theme files just copy the theme files & paste in themes directory. After that you can activate it under Appearance --> Themes.
3. Pages top
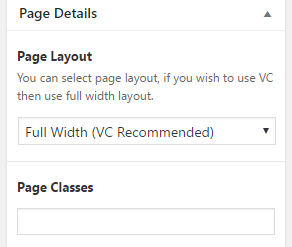
You can create as many page layouts by using Visual Composer, before starting to create a new page make sure you have selected full width layout.
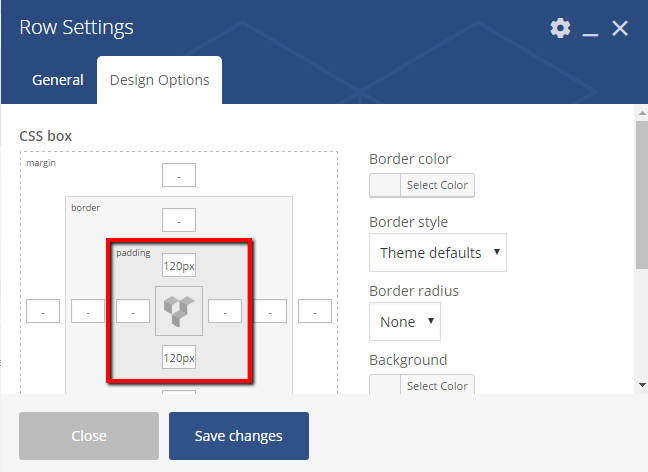
Insert VC row element for each individual section and inside your content; edit your row element and set padding for top and bottom which is necessary.
HOW ONE PAGE WILL WORK
Create a new page, add row element and set padding as mentioned above. This one row will work as 1 section of your page, you can insert as many elements in single section.
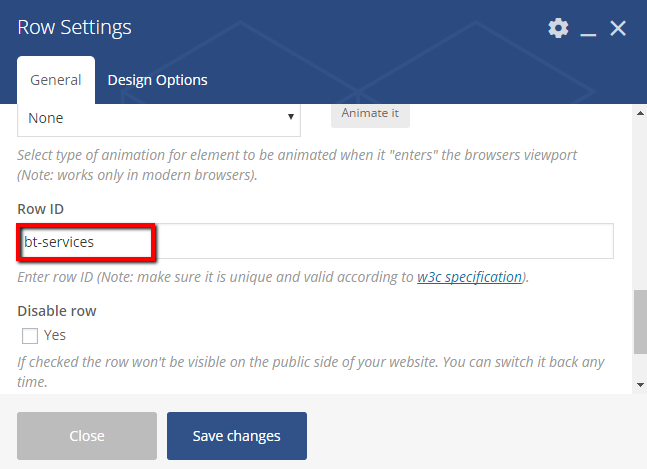
Create as many section in single page and assign different ID to each section, the ID must be unique and it should not have special characters.
Edit your row element and scroll to bottom where you find input field for ID:
Please make sure you have selected One Page template for your page.
How to sync it with menu.?
Scroll to bottom and see MENU section.
4. Menu top
Theme came with 3 type of menus; primary and hamburger:

For one page layout you have remember section/row id's in top PAGE section, now add simple custom link prefix with # sign and your id: #services
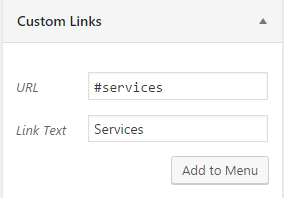
Add all custom links with as per sections ID's you have created and assign any one menu to it, your one page will be ready.
Compulsory settings
Enable menu classes from top right screen options:
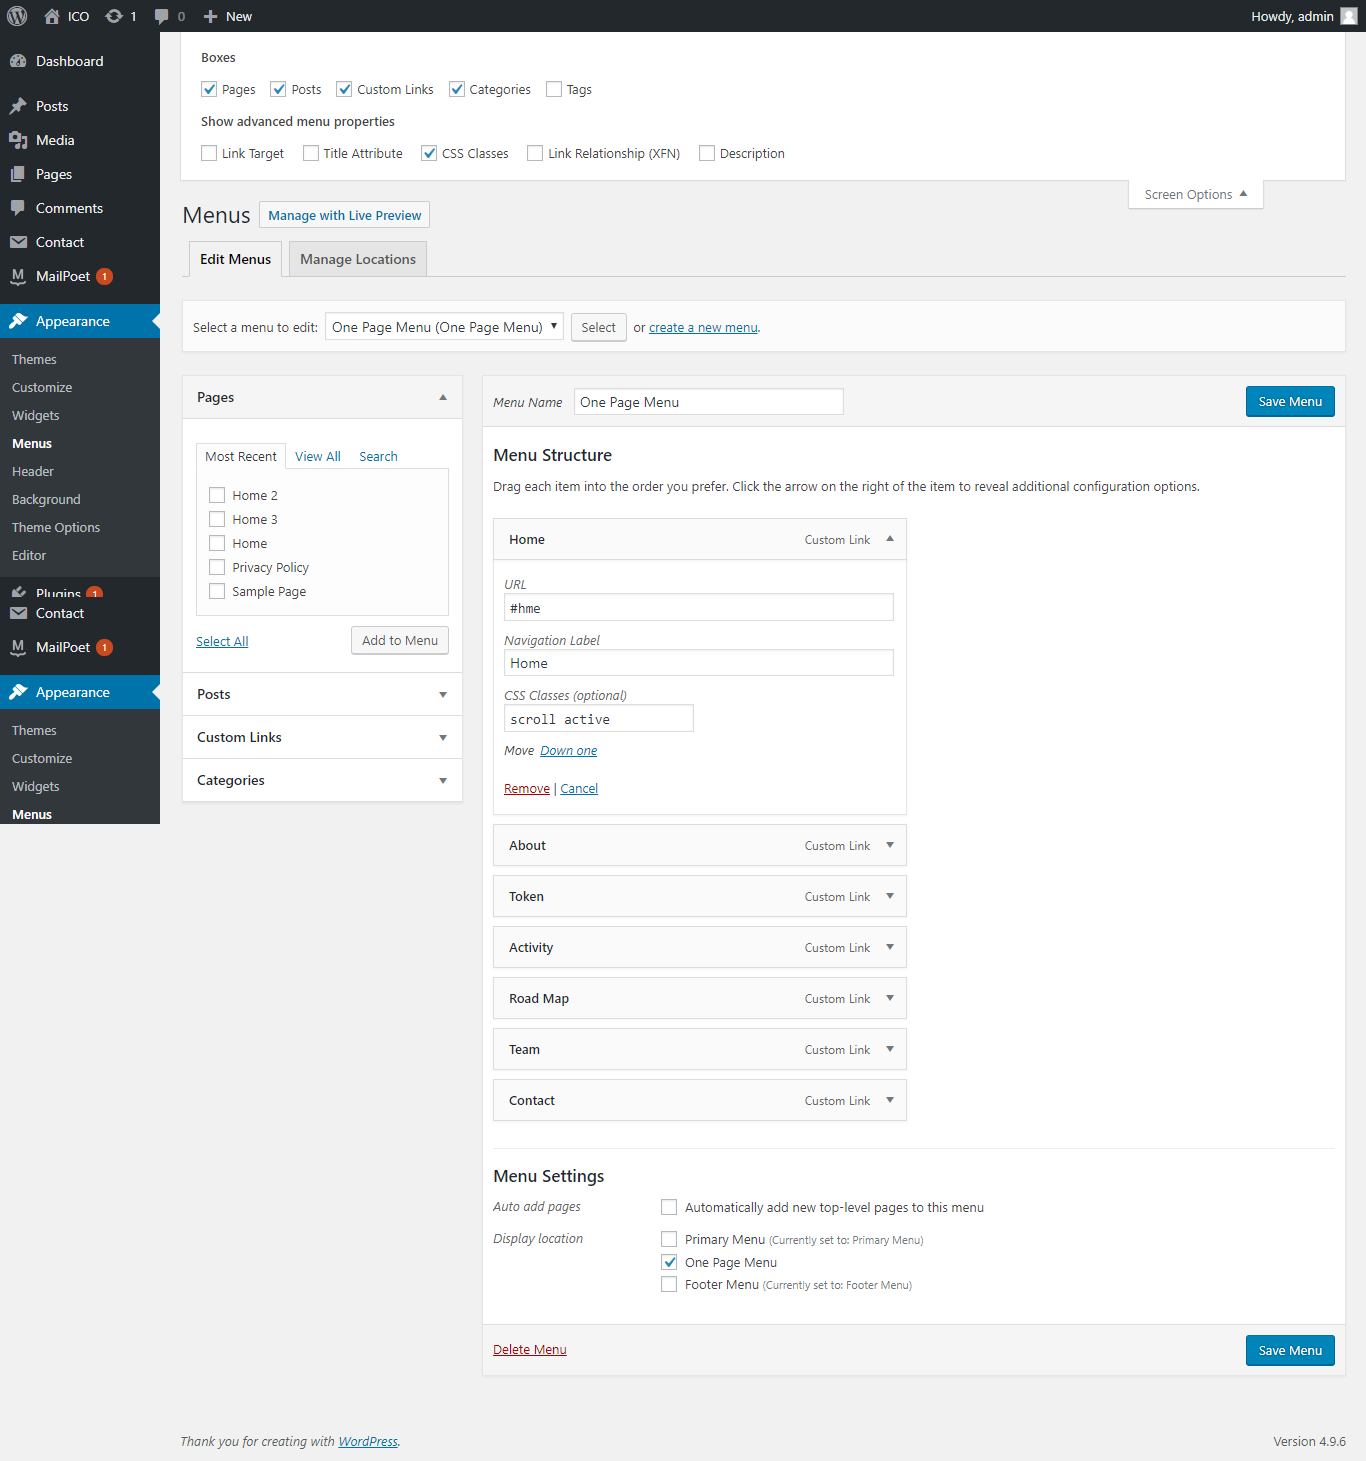
To make menu item highlighted, add class name scroll to menu classes; if you wish to make active any section then add active as well. Make sure you have added active class name only single menu item and scroll class name to each.
HOME AND FOOTER LINK IN MENU
For home and footer links in menu use below id's:
- Home: #hme
- Footer: #contact
5. Icons top
Icon List
flaticon-team
flaticon-building
flaticon-refresh-left-arrow
flaticon-rotate
flaticon-bitcoin-logo
flaticon-smartphone
flaticon-payment-method
flaticon-money-4
flaticon-money-3
flaticon-credit-card
flaticon-credit-cards-payment
flaticon-money-2
flaticon-money-1
flaticon-dollar
flaticon-coin
flaticon-profits
flaticon-wallet-1
flaticon-wallet
flaticon-money
flaticon-bars
flaticon-secure-shield
flaticon-flat-world-map
flaticon-world-map
flaticon-worldwide
flaticon-globe
flaticon-india
For more icons you can select it from here: https://fontawesome.com/
6. Contact top
You can install any plugin for contact form but contact form 7 is recommended. How to add placeholder inside the form fields like demo, you can do it by following this like http://contactform7.com/setting-placeholder-text/
You have to use below structure for form layout.
7. Theme Options top
All theme options are self-explanatory, you can use any option to override the default values.
8. Sources and Credits top
9. Updates top
It's highly recommended to create your own css/js files if you make changes.
CONTACT US IF YOU HAVE QUESTIONS
- gomalthemes -